

Home Improvement Project Guide: Plan It Right

TL;DR:
- A home improvement project guide provides a step-by-step framework for planning, budgeting, and completing renovations on time and within budget. It emphasizes the importance of defining scope upfront, following a fixed construction sequence, and securing permits to avoid costly mistakes. Proper closeout and withholding retainage ensure legal protection and project quality.
A home improvement project guide is a structured, phase-by-phase roadmap that helps homeowners plan, budget, and complete renovations without costly surprises. Skipping steps or working out of order is the single most expensive mistake you can make. Labor accounts for roughly 65% of total project costs, so every hour of rework cuts deep into your budget. This guide walks you through each critical phase, from locking your scope to collecting lien waivers at closeout, so you finish on time, on budget, and with results you’re proud of.
What does a home improvement project guide actually cover?
A home improvement project guide covers six core phases: scope definition, budgeting, permits, construction sequencing, milestone tracking, and project closeout. Each phase builds on the one before it. Skipping ahead, say, ordering materials before permits are approved, creates bottlenecks that cost more to fix than they would have cost to prevent. The most effective renovation plans treat these phases as a fixed sequence, not a flexible checklist.

Homeowners often focus on aesthetics first, but function and structural integrity should drive renovation decisions. A beautiful kitchen with outdated wiring or a leaking subfloor is a liability, not an upgrade. Prioritizing structure over style at the planning stage protects both your investment and your family.
How to define and freeze the scope of your project
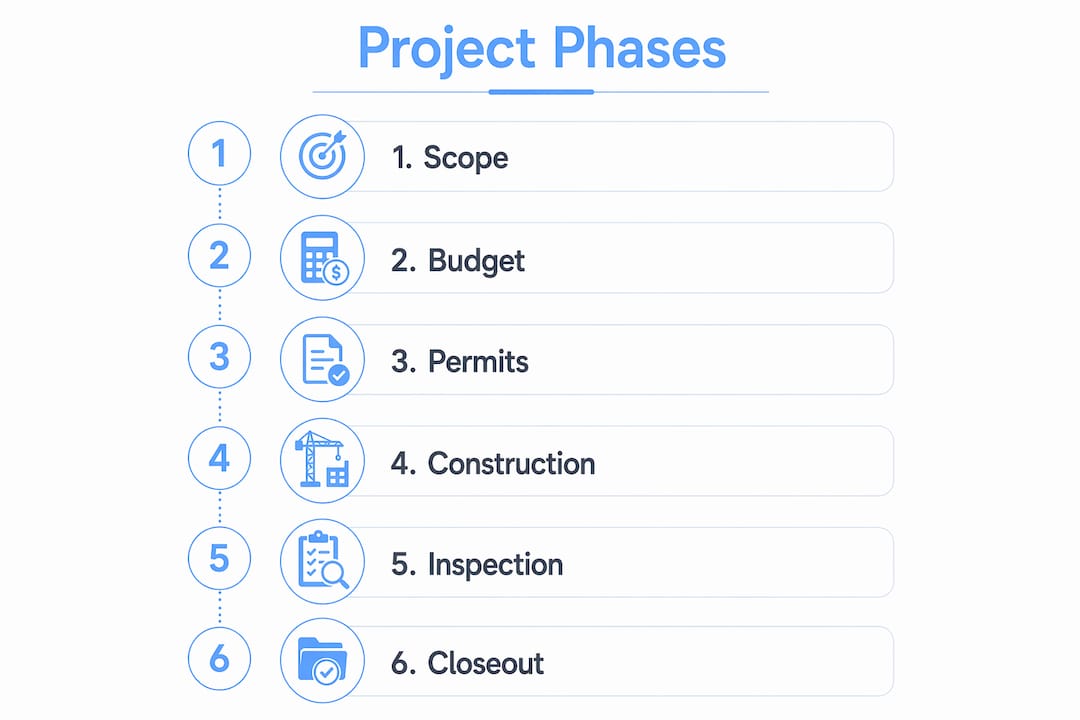
Scope definition is the foundation of every successful renovation. Without a locked scope, contractors cannot give you accurate bids, and you cannot hold anyone accountable to a fixed price. Changes made after drywall installation require demolition and drive costs up significantly. The rule is simple: freeze your design completely before any demolition begins.
A locked scope means every decision is documented before work starts. That includes:
- Materials and finishes: Tile size, grout color, cabinet style, countertop material, and hardware selections
- Fixture specifications: Exact model numbers for plumbing fixtures, light fixtures, and appliances
- Dimensions and layout: Measured drawings or architectural plans for every space being altered
- Structural changes: Any wall removals, window additions, or load-bearing modifications
- Mechanical requirements: HVAC, plumbing, and electrical changes tied to the new layout
Ambiguity in any of these areas becomes a change order during construction. Change orders are expensive, disruptive, and almost always avoidable with upfront planning.
Pro Tip: Create a two-column worksheet with “Must-Have” and “Nice-to-Have” columns for every room. Anything in the “Nice-to-Have” column gets cut if the budget tightens. This single habit prevents scope creep on most projects.
A useful home improvement checklist walks you through every decision point before you call a contractor. Use it as your scope-locking tool, not just a to-do list.
How should you budget for a home renovation?
Realistic budgeting starts with understanding where your money actually goes. Labor accounts for roughly 65% of total project costs, with materials making up the remaining 35%. That ratio surprises most homeowners who assume materials are the bigger expense. It means a $50,000 kitchen remodel allocates roughly $32,500 to labor and $17,500 to materials.
Hard costs vs. soft costs
Hard costs are direct construction expenses: labor, materials, fixtures, and equipment. Soft costs are everything else: design fees, permit fees, inspections, temporary housing, and storage. Homeowners frequently budget only for hard costs and then scramble when soft costs arrive.
Contingency reserves
Contingency reserves of 10–20% of the total budget are standard practice. Use 10% for cosmetic projects in newer homes where surprises are unlikely. Use 15–20% for older homes, structural projects, or any renovation where walls will be opened. Older homes and structural projects consistently hit the higher end of that range. Treating contingency as optional is the most common reason projects stall mid-construction.
The 30% rule of home renovation states you should avoid spending more than 30% of your home’s current market value on a single project. This protects your resale position and keeps your investment aligned with neighborhood values.
| Budget Category | Typical Allocation | Notes |
|---|---|---|
| Labor | ~65% of hard costs | Varies by project complexity |
| Materials and fixtures | ~35% of hard costs | Lock in prices before bidding |
| Soft costs | Variable | Design, permits, inspections |
| Contingency (new home) | 10% of total budget | Cosmetic or low-risk projects |
| Contingency (older home) | 15–20% of total budget | Structural or unknown conditions |
Pro Tip: Track every expenditure in a simple spreadsheet from day one. Log invoices, deposits, and change orders as they happen. Waiting until the end of the project to reconcile costs is how budgets spiral without anyone noticing.
For a detailed breakdown of how to price each phase, the renovation budget guide on the Bidwolf blog covers cost estimation by project type.
When do you need a permit for home improvement work?
Permits are required for any work that affects structure, safety systems, or the legal use of a space. Structural, electrical, plumbing, mechanical, and change-of-use projects all require permits in most jurisdictions. Converting a basement to a bedroom, adding a bathroom, or moving load-bearing walls are clear examples. Cosmetic work like painting, trim installation, and cabinet replacement is generally permit-exempt.
Skipping a required permit creates two serious problems. First, the work may fail inspection when you sell, forcing you to open walls and redo work at your own expense. Second, your homeowner’s insurance may deny claims for damage related to unpermitted work.
The permit and inspection process typically follows this sequence:
- Submit permit application with plans, specifications, and applicable fees to your local building department
- Receive permit approval before any demolition or construction begins
- Rough-in inspection after framing, electrical, plumbing, and HVAC rough-in work is complete but before walls are closed
- Insulation inspection in jurisdictions that require it, before drywall is installed
- Final inspection after all work is complete, triggering the certificate of occupancy for applicable projects
For homes built before 1978, lead-safe renovation practices are legally required when disturbing painted surfaces. Contractors must hold EPA Lead-Safe Certification. Hiring an uncertified contractor for this work exposes you to fines and health risks.
Check your local building department’s website for jurisdiction-specific requirements. Requirements vary significantly between cities, counties, and states. What requires a permit in one Texas city may be exempt in another.
What is the correct construction sequence for a home renovation?
Every successful remodel follows a fixed construction sequence: demolition, structural work, rough-in trades, inspections, insulation, drywall, and finishes. Performing tasks out of order is the single most expensive mistake homeowners make. Installing drywall before rough-in inspections pass means tearing it out. Setting cabinets before flooring is installed creates alignment problems that require rework.
The correct sequence for a typical interior renovation is:
- Demolition: Remove existing finishes, fixtures, and any structural elements being altered
- Structural work: Frame new walls, install beams, modify load-bearing elements
- Rough-in trades: HVAC ductwork and equipment, plumbing supply and drain lines, electrical wiring and panels
- Rough-in inspections: All trades must pass inspection before walls are closed
- Insulation: Install after inspections are approved
- Drywall: Hang, tape, mud, and finish
- Finishes: Paint, flooring, tile, cabinetry, countertops, fixtures, and trim
Managing lead times and milestones
Cabinetry has a lead time of 6–12 weeks, windows and doors run 8–14 weeks, and appliances typically take 4–10 weeks. Order all long-lead items at the same time you submit permits. Waiting until construction starts to order cabinets is one of the most common causes of project delays.
Track milestones rather than daily progress. Key milestones include permit approval, demolition complete, rough inspection passed, drywall installed, cabinet set, countertops in, and punch list done. Milestone tracking gives you clear checkpoints without requiring you to micromanage every trade.
| Milestone | Trigger for Next Phase |
|---|---|
| Permit approved | Begin demolition and order long-lead items |
| Rough-in inspection passed | Install insulation |
| Insulation inspection passed | Hang drywall |
| Drywall complete | Begin finish work: paint, flooring, tile |
| Cabinet set | Schedule countertop templating |
| Punch list complete | Release final payment and collect lien waivers |
Pro Tip: Tie every contractor payment to a completed milestone, not a calendar date. This keeps the project moving and gives you financial leverage if work stalls. Never pay ahead of completed work.
How do you close out a home improvement project properly?
Project closeout is where most homeowners lose money and legal protection. Substantial completion means the project is usable for its intended purpose but minor items remain. Final completion means every item on the punch list is resolved and all inspections are passed. Releasing full payment at substantial completion, before final completion, removes your leverage to get remaining work done.
A thorough punch list protects you at closeout. Build yours by walking every room with your contractor and documenting:
- Unfinished items: Paint touch-ups, missing trim pieces, incomplete caulking
- Deficiencies: Doors that don’t latch, tiles with lippage, fixtures that don’t operate correctly
- Missing items: Hardware not yet installed, appliances not yet delivered or connected
- Damage: Any surfaces scratched or damaged during construction
Photograph every item on the punch list with date-stamped photos. Written descriptions paired with photos eliminate disputes about what was agreed upon.
Retainage of 5–10% of the total contract value is standard practice. Withhold that amount until the punch list is fully resolved. This financial leverage is the most effective tool you have to get contractors back for minor remaining work.
Never release final payment before collecting lien waivers from every subcontractor and supplier who worked on your project. Mechanic’s liens can be filed against your home even after you’ve paid the general contractor in full, if that contractor failed to pay their subs. A signed lien waiver from each party is your legal protection.
After closeout, organize all warranty documents, appliance manuals, and as-built plans in a single binder or digital folder. You will need them for future repairs, insurance claims, and resale.
Key Takeaways
A successful home renovation requires locking scope before demolition, budgeting with a 10–20% contingency, pulling required permits, following the fixed construction sequence, and withholding retainage until the punch list is complete.
| Point | Details |
|---|---|
| Lock scope before demolition | Freeze all design decisions and material selections before any work begins to avoid costly change orders. |
| Budget with contingency | Allocate 10–20% of total budget as a reserve; use the higher end for older homes and structural projects. |
| Pull permits before starting | Permits protect resale value and insurance coverage; skipping them creates legal and financial risk. |
| Follow the fixed sequence | Demo, structural, rough-in, inspections, insulation, drywall, finishes. Working out of order is the costliest mistake. |
| Withhold retainage at closeout | Keep 5–10% of contract value until the punch list is complete and all lien waivers are collected. |
What I’ve learned from watching homeowners manage renovations
Devin’s perspective
The single biggest mistake I see homeowners make is treating the budget conversation as something to have after they fall in love with a design. By the time you’ve committed emotionally to a specific tile, a particular cabinet line, or a layout change that requires moving a load-bearing wall, you’ve lost your ability to make rational trade-offs. The budget conversation has to come first, before any design decisions are finalized.
I’ve also noticed that homeowners who communicate in writing with their contractors have dramatically fewer disputes than those who rely on verbal agreements. A quick text or email confirming what was discussed in a site meeting creates a paper trail that protects both parties. It’s not about distrust. It’s about clarity. Contractors appreciate it too, because it reduces callbacks and confusion.
The other thing I’d push back on is the idea that hiring the lowest bidder saves money. A bid that’s 20% below every other bid is almost always missing scope. Either the contractor plans to make it up in change orders, or they’re cutting corners on materials or labor quality. Get three bids, understand what each one includes, and choose based on value and verified credentials, not price alone.
Platforms like Bidwolf make this easier by connecting you with vetted local contractors and letting you compare bids side by side. But the discipline of asking the right questions and reading the scope of work carefully still falls on you. No platform replaces that homework.
— Devin
Bidwolf connects you with the right contractors for your project
Planning a renovation is one thing. Finding a contractor you can trust to execute it is another challenge entirely.

Bidwolf is a digital marketplace where you post your project and receive competitive bids from vetted, verified local contractors. Whether you’re managing a bathroom remodel, a roofing replacement, or a full kitchen renovation, you can post your project and compare bids from licensed professionals in your area. Bidwolf’s built-in messaging keeps all contractor communication in one place, and the platform supports milestone tracking so you stay in control from permit approval to punch list. Ready to find the right team? Browse local contractors and get your first bids today.
FAQ
What is a home improvement project guide?
A home improvement project guide is a structured, phase-by-phase framework covering scope definition, budgeting, permits, construction sequencing, and project closeout. Following this sequence reduces costly mistakes and keeps renovations on schedule.
How much contingency should I budget for a home renovation?
Allocate 10% contingency for cosmetic projects in newer homes and 15–20% for older homes or structural work. Contingency covers unforeseen conditions discovered once walls are opened.
Which home improvement projects require a permit?
Structural, electrical, plumbing, mechanical, and change-of-use projects require permits in most jurisdictions. Cosmetic work like painting and trim installation is generally permit-exempt, but requirements vary by city and county.
What is retainage and why does it matter?
Retainage is 5–10% of the contract value withheld until the punch list is fully complete. It gives homeowners financial leverage to get contractors back for remaining work and deficiency corrections.
When should I order cabinets and windows for a renovation?
Order cabinets, windows, and appliances at the same time you submit your permit application. Lead times run 6–14 weeks for cabinets and windows, so ordering late is one of the most common causes of construction delays.